 hello....
lover of graphic design..... how are you?.
these few days I don't post,. yach.... I as a contractor whose work turns. in this tutorial session I will share with you guys about making the clock. this brilliant idea I got from a businessman at the wall clock located in Surabaya, the story : three days ago I received an e-mail delivery business, that its request for an address and want to make a design image with a sports theme..
from there I get this idea
ok ... we just started ..
create a new layer with the size of 10x10 inches with a white background, then create another new layer by right-clicking on the background layer>> creat new layer, then change the foreground color in the Tool Box with color code ec3a39, continue by pressing Alt + Bksp on keybord. use the Elliptical Marquee Tool and create selection area with full size, right click on the layer choose Select Inverse to clear the selection we do not want and right click again select Feather to smooth the edges of the selection results continue by pressing the Del key on the keyboard.

then make a selection field within the circles that had been, but for a smaller size, right click select Feather to smooth the edges of the selection results continue by pressing the Del key on the keyboard.create a new layer again, now change its foreground color with color code ba3339, then press Alt + Bksp on the keyboard. activate the first layer we have created earlier, then select the Magic Wand Tool and click in the middle of the circle, switch again created a new layer, right click>> Select Inverse, and press Del, and than activate the Brush Tool (B), change its foreground color with color code #ffffff and opacity to 53%. click on the four point where, like the following picture:

create a selection field in the middle of the circle, use the Elliptical Marquee Tool (M) with a smaller size, and delete.

The next step, set the layer style. activate the first layer we created earlier, right click in the layers pallete and select Blending Optionts, then change the settings of the Outer Glow, Inner Glow, Bevel and Emboss, Grdient Overlay and Stroke as shown below:
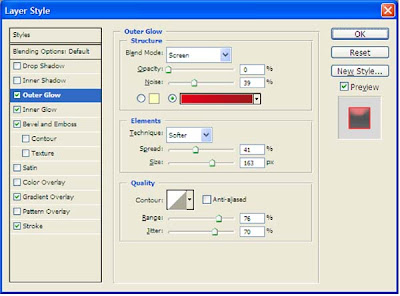
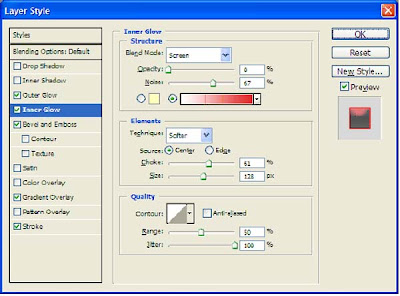
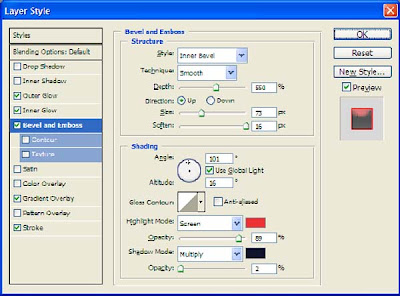
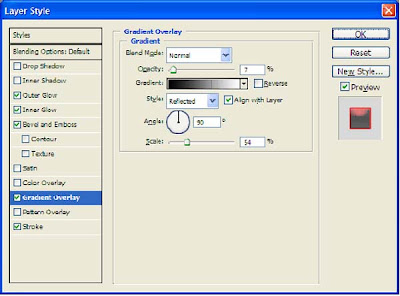
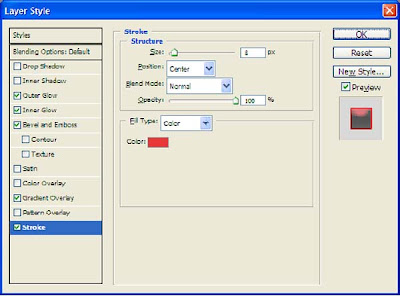
and then activate the second layer, layer styles set back the same way as above, then change the settings of the Inner Glow, Bevel and Emboss and stroke, as shown below:
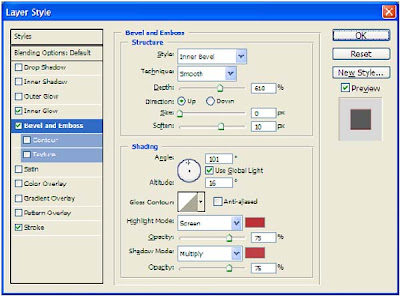
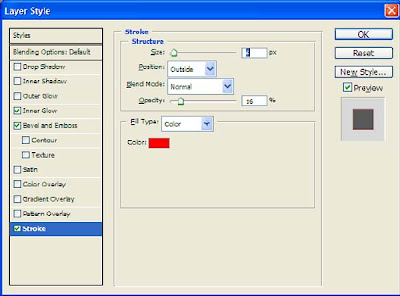
Wow .... really tiring...
create new layer by Creat New Layer which is located on the bottom right pallete, change background color with black, at this stage, I use the Rectangular Marquee Tool (M) on the tool options box, make a plot of the transverse line, and then select select the right kilik inverse continue by pressing the DEL key on the keyboard, and duplicate the layer is as much as six times, then combine all these lines with Ctrl + E (Marge Down), as below:
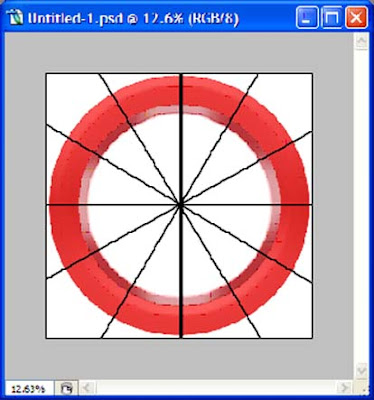
still active in the layer above, use the Elliptical Marquee Tool (M), create a circle selection, adjust its size with a circle of the smallest wall clock, then right click>> select inverse and continue by pressing the DEL key.
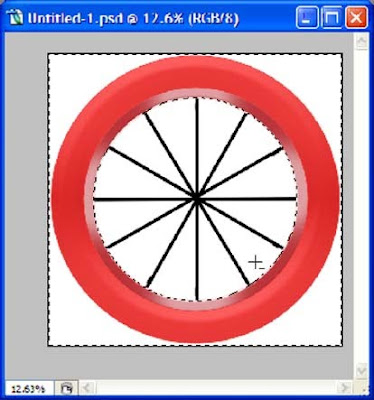
The next step, use the Elliptical Marquee Tool (M), create a circle selection again, its size is smaller than the circle which we had to make, continue by pressing the DEL key, it will be like this:

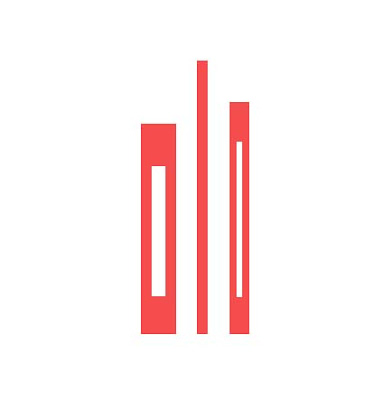

now we move into the final part of making this wall clock is the clock:
create a new layer with the background color red, making this the clock I use Elliptical Marquee Tool (M),. make it like the following image clockwise (to form the clock adjust to the taste of your heart.

then drag the three needles that hour, hour and collated into the layer as desired Kalia. create another layer within the canvas (like in the beginning that's how we have already discussed), select the Elliptical Marquee Tool (M), create a small circular selection and then select the Gradient Tool and click and drag the middle circle to the right selection.


0 comments:
Post a Comment